DIY FITTING GUIDE FOR CARPET TILES
This page will guide you through the process of laying carpet tiles. They are easy to fit and you can save money by doing it yourself. Follow the five simple steps below to achieve a professional looking finish.
Use our carpet tile calculator to find out how many tiles you need.
All you need is a few tools some tiles and you are ready to start. Order 800 tiles or more and we will even give you the tools FREE.
Five simple steps for a professional finish
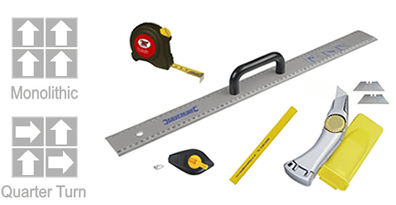
Before you start laying carpet tiles there are a few basic tools you will need to complete the job. A tape measure, fixed blade utility knife, metal ruler and some double sided tape. For larger areas we recommend using carpet tile tackifier adhesive. Make sure you have acclimatised the carpet tiles for at least 24 hours prior to fitting. To do this just lift the tiles from the boxes and stack in piles around the room to circulate the air between. When doing so take care not to damage any corners. This process is especially important during winter months. The tiles can arrive cold after being stored in our warehouse or left overnight at a transport depot. By laying straight into a centrally heated room expansion can cause the tiles to peak if not allowed sufficient time to come up to room temperature. Carpet tiles are easy enough to lay yourself and you can even custom design your floor by using coloured borders, making patterns or insetting shapes and letters.
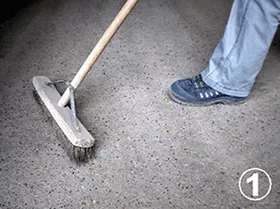
1. The subfloor must be firm, clean and dry. You can either sweep the floor or use a vacuum cleaner to lift any loose dirt or dust. The tiles will lay straight onto either a stone, concrete or wooden floor without the need for underlay.
Any existing floor coverings like carpet or underlay must be totally removed prior to fitting. If the old carpet has been glued down then we recommend cutting into strips with a hook blade knife and for large areas hiring a carpet lifting tool to assist with removal.
All damp floors need to be sealed first with an appropriate sealer. Repair uneven floors or damage with a self levelling screed.
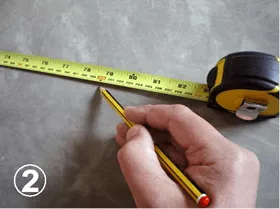
2. On the back of each tile there are pile direction arrows. You can lay the arrows different ways to achieve shading effects either monolithic or quarter turn. Measure the width and length of the floor to determine the centre of the room.
Mark with a chalk line or pencil where the lines cross. Next check the number of full tiles both ways and try to leave at least half a tile to cut round the edge.
We find dry laying a row both ways helps to complete this task. If need be adjust the centre point and re-mark. We advise against starting with a whole tile on one wall as you may be left with a small cut the other side.
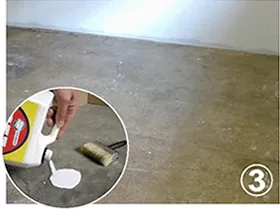
3. When laying the tiles using carpet tile tackifier adhesive make sure you have carefully read the instructions on the rear of the tub before use. It is an off white liquid similar to PVA glue and can be applied by either roller or brush (1 litre of adhesive is enough to lay 24 – 28 tiles with total coverage).
It is important you wait for the tackifier to go from white to completely transparent before laying the carpet tiles otherwise permanent bonding can occur. This is a specially formulated low tack adhesive for use with carpet tiles providing a tacky film to the floor.
In the future you can lift tiles for cleaning or replacement.
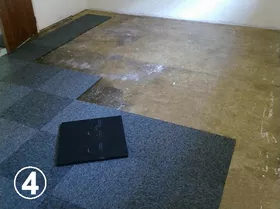
4. From your centre line marks work your way out from the middle of the room with whole tiles to build up the floor. Make sure to butt each one up tight to the other without trapping pile between the joints. If you loose lay the tiles we recommend using double sided tape to stop the tiles from moving during fitting.
Once all the whole tiles have been laid do the cuts around the perimeter. Either use a profile gauge, cardboard template (if cutting round a pedestal basin in a bathroom) or simply measure and mark on the rear of the tile.
Remember always cut from the back of the tile and mind your fingers!
5. To cut the tiles simply score two or three times from the back with a sharp knife and snap like plasterboard. Then draw the knife along the cut line for a clean edge on the pile. Clogged blades can be cleaned by using white spirit and a cloth.
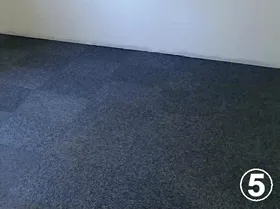
When all the cuts have been completed vacuum the floor to remove any debris left behind from fitting. If you loose lay the tiles we recommend no more than 100 tiles be fitted per room.
Always fix the middle rows and around the perimeter edge by using double sided carpet tape. During fitting periodically check the tiles are tight and aligned as a poorly fitted floor can move.
Pile Direction
On the rear of each tile there are pile direction arrows. When fitting you have the option of laying the carpet tiles either quarter turn or the more traditional broadloom way called monolithic. Quarter turn can be achieved by laying the arrows at 90 degrees to each other. If you lay this way the pile is highlighted giving a subtle light and dark definition to the tiles. Monolithic is where the arrows all point the same direction and this helps to hide the edges of the tiles and gives more of a standard carpet effect (arrow diagrams are shown at top of the page). Laying directions do not affect the wear of the tile in any way but can help to create more of a contemporary look to the area.
Carpet Tile Care and Maintenance
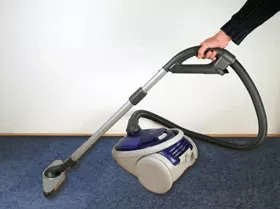
A regular daily vacuum is recommended to keep the appearance of your carpet tiles. Any spills should be lifted immediately with a damp cloth. Most stains can be removed by using an appropriate carpet cleaner however do not use bleach or petrol based products.
If the stain does not come out try moving to a less noticeable place.
We recommend replacing any damaged tiles with new ones so always make sure you keep a few spare in case of future accidents. By using either double sided tape or carpet tile tackifier adhesive on your floor prior to fitting will help to prolong the life of your carpet tiles. For further information or advice please contact us on 1300 453 300.
Reviews

Chris Poulos

John Stewart

K L

Diamond Stores

Pat Tusjak
 The product price and quality was great. I would highly recommend this company as I was surprised there is no review yet on the website or Facebook. Thanks Carpet Tile Online.
